Peel-and-Stick Metal Tile Installation Guide
Warning

Read this installation in its entirety before you begin. The installation of Art3D Peel & Stick Tile is a "easy" project. If you adoubts doing this installation, you should contact a qualified and professional installer.
Tools and Supplies Needed:
- Protective eyewear / safety goggles
- Straightedge / Speed Square
- Pencil
- Soft cloth
- Chalk line
If cutting tiles, one of the following tools will be needed:
- Jig saw or chop saw (recommended)
- Hack saw
- Hole saw or coping saw (for circular cuts or electrical outlet cutouts only)
Lay out & measure
Measure the area to be covered. Lay out the entire project on a flat surface before installing the tiles to be sure you have enough tiles and your design is correct. Using a chalk line, create at least one vertical and one horizontal reference lines to guide tile placement.Cutting Tiles
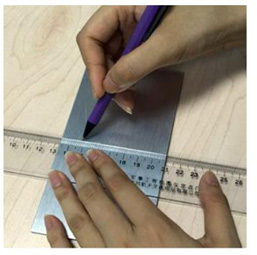 Measure and mark the tile with a marker on the protective film where the cut must be made.
If cutting tiles is necessary, using a chop saw is the recommended cutting method. Be sure to follow all safety procedures, including using safety eyewear, when using saw.
Alternative cutting methods are a miter box or hack saw for any necessary straight cuts. When cutting is complete, use a fine-grit sandpaper or a small metal file to debur the cut edges. Take the cut tile to the work space and place it in its intended location, ensuring it fits properly before removing the protective film on either side of the tile.
Measure and mark the tile with a marker on the protective film where the cut must be made.
If cutting tiles is necessary, using a chop saw is the recommended cutting method. Be sure to follow all safety procedures, including using safety eyewear, when using saw.
Alternative cutting methods are a miter box or hack saw for any necessary straight cuts. When cutting is complete, use a fine-grit sandpaper or a small metal file to debur the cut edges. Take the cut tile to the work space and place it in its intended location, ensuring it fits properly before removing the protective film on either side of the tile.
Fitting Partial Tiles
To fit partial tiles, lay the tile to be cut exactly over the last full tile. Place another full tile against the wall and mark the cutting line where the tiles overlap. Cut tile on line. Before peeling the backing paper off self-adhering tile, check that the cut tile fits. Do not force it into place. Install tile (removing paper from self-adhering tile), and press tile firmly into position.Lay out & measure
Measure the area to be covered. Lay out the entire project on a flat surface before installing the tiles to be sure you have enough tiles and your design is correct. Using a chalk line, create at least one vertical and one horizontal reference lines to guide tile placement.Install The First Tile
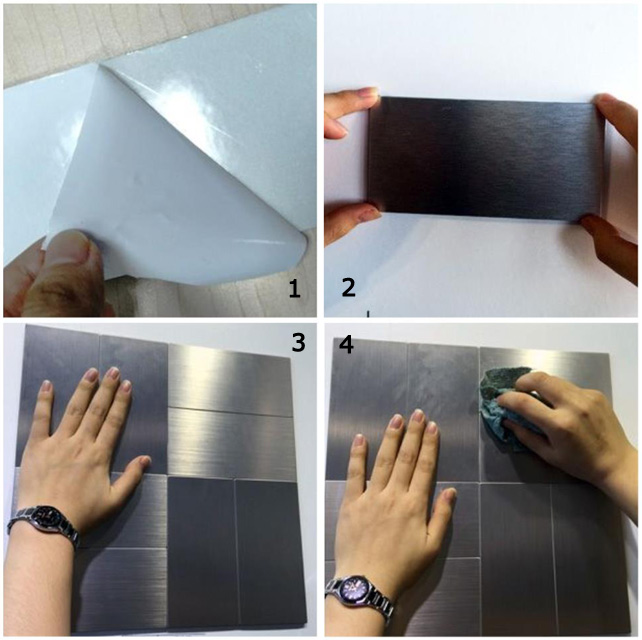
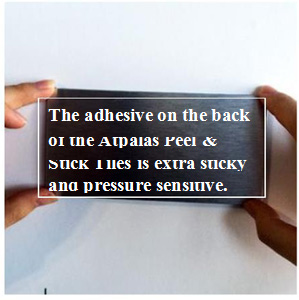 Keep the wall clean and dry. Remove the film backing from both sides of the tile. Lightly place the tile onto the wall The adhesive on the back using your reference lines. Do not apply pressure to the tile until you are sure of your placement. The aggressive design of the adhesive right position, firmly apply even pressure across the entire tile.
CAUTION: Place release paper in a wastebasket immediately upon removal from tile.
[caption id="attachment_11620" align="aligncenter" width="642"]
Keep the wall clean and dry. Remove the film backing from both sides of the tile. Lightly place the tile onto the wall The adhesive on the back using your reference lines. Do not apply pressure to the tile until you are sure of your placement. The aggressive design of the adhesive right position, firmly apply even pressure across the entire tile.
CAUTION: Place release paper in a wastebasket immediately upon removal from tile.
[caption id="attachment_11620" align="aligncenter" width="642"] 1. Remove paper from self-adhering tile.
 2. Place it in its intended location.
3. Press each again firmly with hand. This will ensure that the adhesive bonds to the substrate.
4. Clean tiles with water and soft cloth[/caption]
Tags: Peel & Stick Tile , Installation Guide , Metal Tile
Previous: Important Notice: Delay Shipment for Order After 1st. Feb
Next: Welcome to Art3d.com