How To Install The Seam Joining Mosaic Wall Tiles (Video)
Method 1:  Method 2: Video Video source: https://www.thisoldhouse.com/toh/video/0,,20337249,00.html We got this material from internet, in this video, the Old House senior technical editor Mark Powers shows how to install a glass mosaic, for Art3dTM seam joining shell mosaic wall tiles, the installation method is the same. 1. Turn off the power to receptacles and remove their face plates. Move the range and install a temporary ledger. Rough up old paint with sandpaper or prime dark paint with a sealer-primer. 2. Mark the centerline of your focal point. Dry-fit the tiles to determine how many sheets you need and where the sheets will be cut. Leave an 1/8-inch expansion gap at the perimeter. Trim sheets to size and label each one with its position on the wall. 3. Mix the thinset. Apply the thinset with a ¼-inch V-notch trowel, level it with the notched side, then smooth the notches so they don’t show through the glass. 4. Press the first sheet of tiles to the wall along the centerline. Work from the bottom up as you add more sheets. Place a block over the sheets and tap them with a hammer to even them out on the wall. 5. Wait twenty to thirty minutes, then remove the paper facing with a damp sponge. 6. Fill in tiles around receptacles and other obstacles. Use two-wheeled glass nippers to cut the tiles to size, then back-butter them and press them into place. 7. Let the tiles set for 48 hours. Then clean the tiles with a wet sponge, and remove loose thinset from the joints with a nylon brush. 8. Grout the tiles with pre-mixed grout. First wet the tile with a sponge, then, using an epoxy grout float, push the grout into the joints. Pull the float across the tile diagonally to remove the excess. Use a wet sponge to shape the joints and clean the tile. 9. Caulk the perimeter. Let the wall cure for several hours, then remove the ledger and replace the range and receptacles.
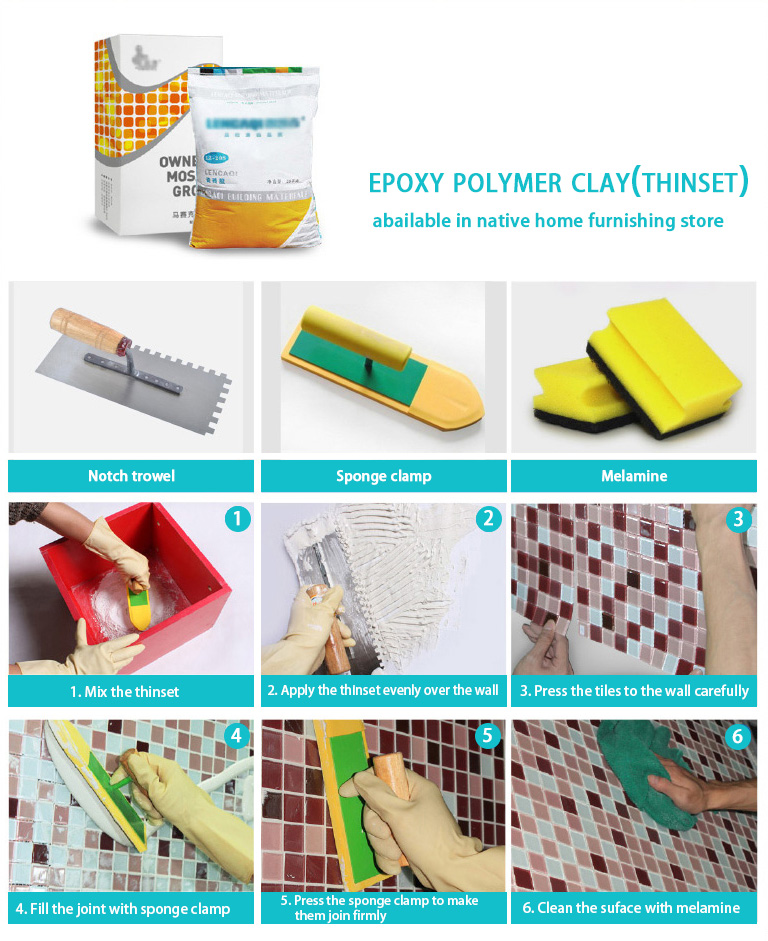
Previous: Peel-and-Stick Metal Tile Installation Guide
Next: Welcome to Art3d.com